
What Is a Mitered Edge Countertop? A Clear Guide to the Detail
What if a countertop that looks twice as thick isn’t cut from a thicker slab at all? If you’ve wondered what is a mitered edge countertop, the answer is in the fabrication: two pieces of stone are cut at matching angles and joined to create the appearance of a deeper, substantial edge. The result can feel architectural and refined, but it’s a crafted detail, not simply a thicker slab.
It’s understandable to find the terminology confusing. A mitered edge can resemble a solid block, while the meeting point between pieces may be visible depending on the material and the precision of the fabrication. Its clean, squared profile also differs from a standard eased edge. The same technique can be used as part of a waterfall design, but the two terms describe different details.
This guide explains how the edge is constructed, what to expect from its seam and visual profile, and how it compares with other countertop details. You’ll also find practical considerations for material patterns, cabinet proportions, and clearances, so you can choose an edge that works with the rest of your design.
Key Takeaways
- Understand what is a mitered edge countertop and how joined stone pieces create its substantial profile.
- Follow the key fabrication stages, from templating and pattern planning to joining, finishing, and installation.
- Compare the clean, deep look of a mitered edge with standard profiles and waterfall details.
- Use a practical design checklist to consider visual weight, cabinet proportions, overhangs, and appliance clearances.
- See how Richmond Stone’s sourcing, templating, fabrication, and installation services bring a custom countertop design together.
What Is a Mitered Edge Countertop? Understand the Signature Thick-Look Detail
A mitered edge countertop uses a separate piece of material joined to the countertop with angled cuts, creating the appearance of a thicker, squared edge. If you’re wondering what is a mitered edge countertop, picture a finished profile made from carefully joined pieces rather than a single, unusually thick slab.
The technique takes its name from the miter joint, a connection formed by bringing angled edges together. At the countertop corner, the cuts meet to create a crisp turn from the horizontal surface to the vertical face. The joint may be visible, and its appearance depends on the material, pattern, fabrication, and viewing angle.
How the angled joint creates the mitered countertop edge
The countertop’s top piece meets a vertical edge piece along matching angled cuts, commonly cut at 45 degrees to form a 90-degree corner. The edge piece, sometimes called an apron, extends downward from the top to create the deeper visual profile. Its depth and finish are design decisions, and the precise fabrication and final appearance depend on the project.
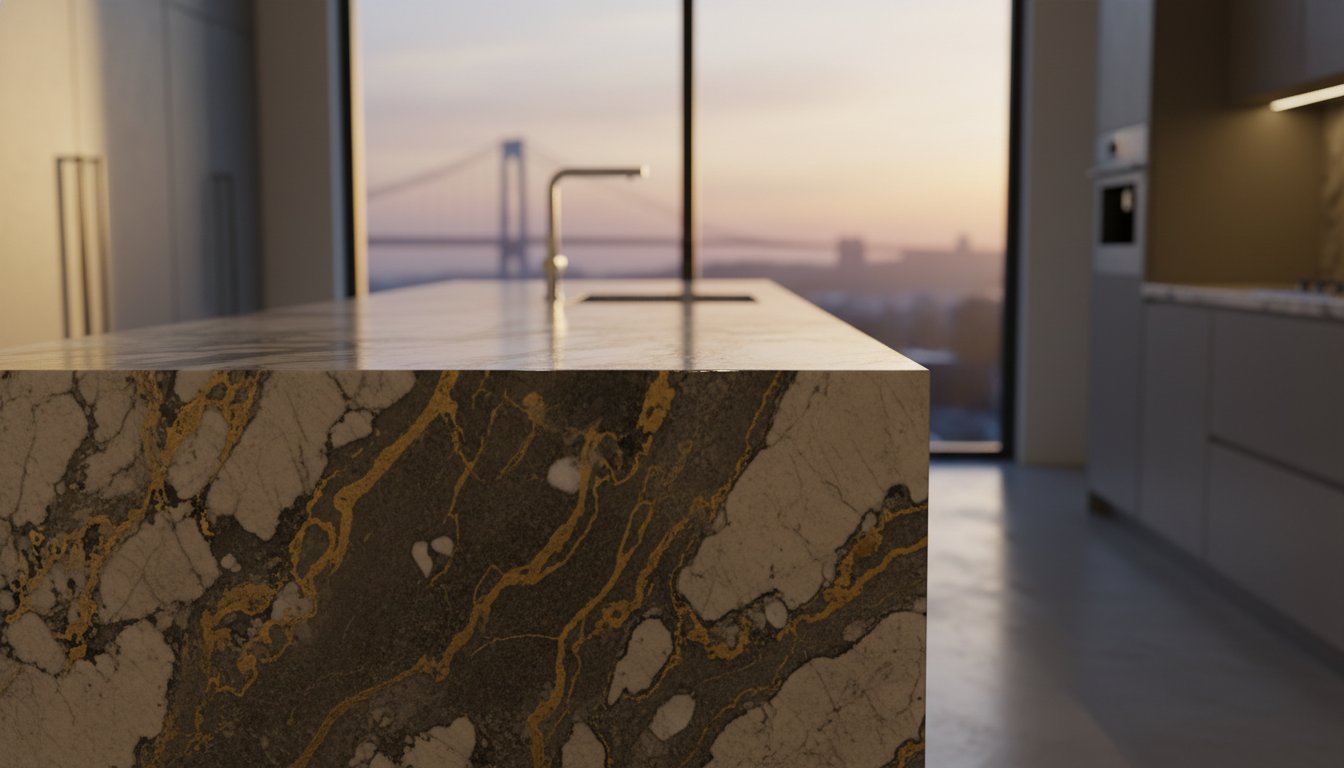
That distinction is central to understanding the look. A mitered edge changes the countertop’s apparent thickness through a joined edge piece; it doesn’t mean the top slab itself is thicker. From the front, the added vertical face can give an island or counter a more substantial, furniture-like presence. At the corner, the joined edges form a clean angle, though the seam may still be discernible.
What a mitered edge looks like from above and from the side
Consider the edge from two viewpoints. From above, you see the countertop surface approaching a straight, squared boundary. The joint may not be prominent from this angle. From the side, the vertical stone face is easier to see: it drops below the top and makes the perimeter look deeper than a standard, softly finished slab edge.
At the outer corner, the horizontal top and vertical face meet at a defined angle. The stone’s pattern may continue across the turn, but how closely the pieces align depends on the material and fabrication. Veining, color changes, and the seam itself can all affect what the eye notices. A mitered profile can feel bold and architectural, but its scale should suit the room and cabinetry around it.
A simple cross-section can make the construction easier to picture. Label the horizontal piece “countertop” and the vertical piece “edge piece,” then mark the angled joint where they meet. From the side, the apron shows how the edge creates the impression of depth. This distinction helps make the design choice tangible before you plan the detail for a specific countertop.
How Mitered Countertop Edges Are Fabricated and Joined
A mitered edge takes shape through a sequence of measurements, material decisions, precise cuts, and careful fitting. The approach varies with the countertop’s layout, material, and design, but each stage affects how the edge will look once installed. Understanding the process helps explain why the finished detail depends on more than the angle of a cut.
From countertop template to angled edge pieces
Templating establishes the countertop’s outline, including its corners, cutouts, and edges. Those measurements also help define the dimensions of the vertical edge piece and how the assembled profile will meet the cabinetry. Before cutting, the fabricator considers the chosen material and how its pattern will appear across the top and edge. The countertop’s shape and the design preferences guide the fabrication plan.
A typical fabrication sequence includes several coordinated steps:
- Template the layout. Record the countertop’s dimensions and the locations where edges, corners, and cutouts must align.
- Plan the material. Review the stone’s color, veining, or other pattern features, then decide how the top and vertical piece should relate.
- Cut the pieces. Shape the countertop edge and the separate edge piece with matching angles. The cut plan follows the intended profile and project measurements.
- Join and finish. Bring the angled pieces together, refine the corner, and finish exposed surfaces to suit the design.
- Fit the countertop. Install the fabricated top in its intended position, aligning it with the cabinets and surrounding surfaces.
Joining, seam placement, and the finished corner
At the joining stage, the angled faces meet to form the countertop’s corner and vertical profile. The joint may be more or less noticeable depending on the material, pattern, placement, and workmanship. Directional veining, for example, can draw attention to how the pattern meets across the top and edge, while a more consistent pattern may create a quieter transition. A mitered edge countertop isn’t defined by a promise of an invisible seam, but by the way its joined pieces create the intended profile.
Finishing shapes the exposed surfaces and brings the corner into visual harmony with the rest of the countertop. Fitting matters just as much: the finished edge needs to sit properly within the measured layout and meet adjacent surfaces as planned. This overview of mitered edge countertop fabrication can help clarify how the joined pieces form the detail.
Precise planning matters because the cut, pattern alignment, and edge dimensions all shape what the finished joint reveals. Richmond Stone’s countertop process includes sourcing, templating, fabrication, and professional installation, bringing these decisions together for a custom project. For guidance on turning an edge idea into a measured design, explore custom countertop planning.
Mitered Edge vs. Standard Edge and Waterfall: Compare the Looks
Choosing an edge detail changes how a countertop meets the room. A standard profile keeps attention on the stone’s surface and silhouette; a mitered edge gives the perimeter a more substantial, squared presence. A waterfall takes the material farther by carrying it down the side of an island or cabinet. The right choice depends on the visual weight you want and how the countertop relates to the surrounding design.
Mitered edge or standard countertop edge profile?
A standard edge is shaped from the countertop itself. A simple eased profile, for example, softens the top corner while keeping the edge close to the slab’s actual thickness. A mitered profile has a deeper-looking vertical face, so it can make an island read as a more pronounced architectural element. Neither is inherently better: one offers a restrained outline, while the other creates a stronger frame around the surface.
Imagine the same stone on two islands. With an eased edge, the slab reads as a sleek horizontal plane, and its color or veining takes the lead. With a mitered edge, the deeper perimeter becomes part of the composition, adding visual presence before the eye reaches the cabinetry. The effect isn’t tied to one prescribed thickness. Consider the edge dimensions in relation to the island’s size, cabinet proportions, and the overall room.
| Detail | Visual effect | Construction | Design context |
|---|---|---|---|
| Standard edge | A defined but relatively slim perimeter | The slab’s edge is shaped into a profile | Works with understated or traditional designs |
| Mitered edge | A deeper, squared-looking edge | Angled pieces are joined at the countertop perimeter | Suits designs that call for a more substantial outline |
| Waterfall | Stone appears to continue down an island side | A side panel extends from the countertop toward the floor | Creates a more continuous island feature |
When a mitered edge becomes a waterfall detail
A mitered edge describes the treatment at the countertop’s perimeter; by itself, it doesn’t mean the stone continues down to the floor. A waterfall is a separate design decision: a vertical panel carries the countertop material down one or both sides of an island or cabinet run. The two details can be combined, so the countertop’s thicker-looking edge meets a descending side panel.
That extension changes the view of the whole island. Rather than seeing only a finished top edge, you see stone traveling down the side and meeting the floor. Pattern alignment becomes an important visual consideration, particularly with directional veining. The design can relate the pattern across the top and side, while the material’s natural character and fabrication affect the final match.
So, what is a mitered edge countertop in this comparison? It’s an edge profile, not a waterfall configuration. Picture the countertop from the front and from the end: if the stone stops at the edge, the detail is mitered; if a panel continues down the side, the design includes a waterfall. This distinction helps you describe the look you want and decide how much visual emphasis the island should carry.

What to Consider Before Choosing a Mitered Edge Countertop
A mitered edge can give a countertop a composed, substantial presence, but the best result depends on how the detail relates to the whole room. Before settling on a profile, consider the island or counter’s scale, surrounding cabinetry, material pattern, and the clearances needed for daily use. The goal isn’t to follow a fixed thickness or overhang rule. It’s to choose proportions that feel intentional in your space.
Proportion, overhang, and clearance around cabinets
Start by viewing the edge in context. A deep-looking profile can anchor a broad island, while the same visual weight may feel dominant on a compact run of cabinetry. Compare the planned edge with cabinet height, door and drawer fronts, island dimensions, and the room’s overall scale. This custom countertop design guide can help frame those choices as part of a coordinated layout.
Then consider how the edge and overhang interact with what sits beneath and around the counter. A vertical edge piece can affect the space near cabinet doors and drawers; nearby appliances, including a dishwasher, also need room to open and operate as intended. Measurements should account for the finished profile, not just the countertop’s top surface. The right dimensions depend on the cabinetry, layout, and design rather than a universal specification.
- Does the edge’s visual weight suit the island and room?
- Will cabinet doors and drawers have clear operating space?
- Have nearby appliances and the planned overhang been considered together?
- Does the profile complement the cabinet style and intended look?
Material pattern, color, and seam visibility
Stone’s pattern is part of the edge design. Prominent veining or a strong directional pattern can draw the eye toward the joint, so consider where the vertical edge piece will meet the top and how the pattern might carry across that corner. A quieter pattern may make the transition less visually prominent, though the joint’s appearance still depends on the material, placement, and fabrication.
Natural stone has individual variations, so planning around the specific material helps set realistic expectations for color and veining at the edge. Quartz offers its own range of patterns and colors, and the selected design still needs to be considered across the joined pieces. Richmond Stone’s natural stone guide provides broader context for appreciating stone’s distinctive character, while its quartz fabrication guide explores the craft behind quartz surfaces.
For a considered choice, bring the edge profile, cabinet proportions, clearances, and material pattern into the same conversation. The Richmond Stone team can help translate those design priorities into a custom countertop plan.
How Richmond Stone Brings a Custom Mitered Edge Countertop to Life
A mitered edge brings together material, proportion, and fabrication in a detail that needs to feel considered from the first selection to the final fit. Richmond Stone guides custom natural-stone and quartz countertop projects through sourcing, templating, fabrication, and professional installation. Family-owned and operated, the company has been in business for over 30 years and serves Staten Island, all five New York City boroughs, the NY metro area, and metro New Jersey.
From material selection through professional installation
The project begins with the material and the desired effect. Natural stone offers individual variations in color and pattern, while quartz provides its own range of surface designs. The chosen material informs how the mitered edge is planned, including how the pattern will meet at the corner. Inventory and availability can change, so confirm inventory details with a salesperson during material selection.
Next, templating translates the room’s measurements into a countertop plan. The template captures the layout and the dimensions that guide the edge profile, helping the design account for cabinets, corners, and the intended overhang. This is where the mitered detail becomes specific to the project rather than a generic profile: the selected edge proportions and the shape of the countertop need to work together.
Fabrication carries that plan into the stone. The countertop pieces and edge components are cut and joined according to the design, with attention to the corner and how the material’s pattern appears across the finished profile. Professional installation completes the sequence, positioning the custom countertop in the space and bringing the fabricated detail into relation with the cabinetry. Each stage informs the next, from selecting a surface to fitting its finished edge.
For homeowners still considering what is a mitered edge countertop in practical terms, the process is the answer: a design decision becomes a measured, material-specific feature through coordinated planning and skilled fabrication. The edge’s visual effect depends on the stone or quartz, the layout, and the proportions chosen for the room.
Discussing a custom countertop project with Richmond Stone
A useful starting point is to consider the overall look you want, the countertop material you’re drawn to, and how the edge should relate to your cabinets and island. Richmond Stone can guide the custom countertop process from material sourcing through installation, with the edge design considered as part of the whole surface. Pricing is provided through a free estimate tailored to your project.
To discuss a project or request an estimate, call (347) 215-2719 or visit the showroom at 2400 Arthur Kill Rd, Staten Island, NY 10309. Richmond Stone serves homeowners across Staten Island, New York City, the NY metro area, and metro New Jersey. Explore custom countertop options.
Shape the Edge Around Your Vision
Now that you know what is a mitered edge countertop, consider how you want the finished room to feel. A countertop edge is a relatively small detail, yet it can influence whether an island reads as a quiet surface or a defining architectural feature. Let that intention guide your material and profile choices.
Before moving forward, gather a few reference images and note what draws you to them: the edge’s visual weight, its relationship to the cabinetry, or the way the surface pattern meets the corner. These preferences give your design conversation a clear starting point and help turn an appealing image into a detail suited to your space.
Richmond Stone brings over 30 years in business to custom countertop projects, with sourcing, templating, fabrication, and professional installation. A free estimate can help you plan the details for your project. Explore custom countertop options and take the next step toward a surface shaped around your home.
Frequently Asked Questions
What is a mitered edge countertop?
A mitered edge countertop creates a deeper-looking perimeter by joining angled pieces of countertop material. The result can make an island feel more substantial without using one solid slab of unusual thickness. For example, the edge detail can give a compact island a more defined outline, while a simpler profile may suit a lighter look. The precise joint, proportions, and finish are tailored to the material and design.
Is a mitered countertop edge completely seamless?
No, a mitered edge isn’t necessarily seamless. The joint can be visible, with its appearance influenced by the stone or quartz pattern, the placement of the join, and the fabrication. A bold vein that crosses the corner may make alignment especially noticeable; a more even pattern may draw less attention to it. Consider the actual material and planned edge together rather than expecting an invisible seam.
Can a mitered edge be made with quartz or natural stone?
Yes. Mitered edge details can be fabricated in quartz and natural stone, including granite, marble, and quartzite. Each material brings a different pattern and color character, which affects how the corner and joint read. Richmond Stone works with natural-stone and quartz countertops, tailoring material selection and project details to the design. Inventory and availability can change, so confirm inventory details with a salesperson during selection.
Does a mitered edge make the countertop slab thicker?
Not necessarily. The countertop can have a joined edge component that gives the perimeter a deeper appearance without the entire top being one thicker slab. This distinction matters when comparing a visual profile with the material thickness itself. The final dimensions and supporting construction depend on the project, so a drawing or sample showing the finished edge can help you understand how the design relates to the cabinetry.
Is a mitered edge the same as a waterfall countertop?
No. A mitered edge refers to the countertop’s perimeter detail, while a waterfall describes material continuing down the side of an island or cabinet, sometimes to the floor. The designs can be combined, but one doesn’t automatically include the other. For instance, a countertop can have a mitered front edge and stop at the cabinet boundary, with no descending side panel.
How much does a mitered edge countertop cost?
The cost depends on the selected material and the scope of the custom countertop project, so a general figure may not reflect your design. Richmond Stone provides free estimates tailored to the project. To discuss an estimate, call (347) 215-2719 or visit the showroom at 236 Richmond Valley Rd, Staten Island, NY 10309. Material choice and countertop layout help shape the estimate.
How do I request a quote for a mitered edge countertop in Staten Island?
Request a free estimate from Richmond Stone by calling (347) 215-2719 or visiting 236 Richmond Valley Rd, Staten Island, NY 10309. For a useful project discussion, bring your preferred material, a sense of the desired edge profile, and any available layout details. Richmond Stone serves Staten Island, all five New York City boroughs, the NY metro area, and metro New Jersey.